Curious how to install the Slingshot BYOD Dash rail? It's pretty easy, but Steph over at NorthShore Overland walks you thru the process in one of his videos. All the hardware is included, and only takes a minute or two.
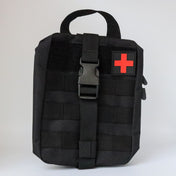
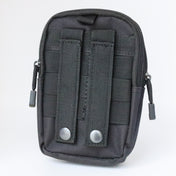
The "Packaging" for the slingshot dash rail is a MOLLE bag, because, why not...I didn't like the idea of getting some fancy pants retail packaging custom made up just for more junk to be thrown away, so we elected to use a MOLLE bag to hold the rail and hardware package. The MOLLE Bag measures about 4x9", and works great as a little catch bag for extra goodies, and can be mounted on any MOLLE panel, like on the back of the Vinyl seats.

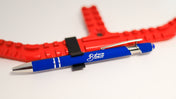
All BYOD rails include a single BYOD Rail clamp, which basically gets you a 1/4-20 threaded hole, so any direct phone mount you may already have will be directly compatible with the BYOD rail, and give you the flexibility to move it around and add more accessories.
The single bolt you need is included, and uses the same T-30 Torx head as many Bronco-bolts, and every Bronco toolkit has a wrench included, so not only is it a very sturdy bolt head (for anyone who's stripped out a cheap allen or phillips head screw, you know what I'm talking about), you've also already got the wrench in your toolkit, no extra tools needed.

In the hardware bag, you'll find some purple thread locker, which isn't always needed, so I always recommend give it a try without any thread locker first and see how it works for you. This is the low strength stuff, which is not very common hanging around the shop, which is why I included it in the package. The medium strength Blue loctite would work, but the problem is because of the smaller size of the hardware, it just has too much grab if you ever need to remove the rail for any reason. The purple thread locker has a much lower strength hold, which we found is more than enough to hold any vibration, but is super easy to remove and won't damage any of the hardware. You can even use it on the phone mount threads, as the purple stuff also works great for aluminum (again, the blue or red can cause galling on the aluminum and you risk ruining the threads permanently when you try to remove it or reposition).

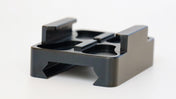
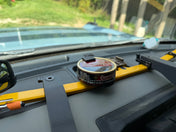
The Slingshot includes three mounting points, two pieces are plastic thing-a-ma-bobs which are held in place with double sided tape, and help lock the rail against the dash and keep it from rotating.

There is also a rubber washer which goes under the bolt. These not only keep the rail locked in position, but also provide a soft pad to set on you dash, so the aluminum rail is not directly contacting your plastic dash, which anytime you mount metal directly onto plastic, the metal wins, and the plastic ends up with scratches dings and scuffs.

Since nothing is forever, you can feel safe installing our BYOD dash rail, knowing that if ever you decide to remove it, there's no permanent damage to your Bronco.